
Introduction
Most photographers using a film or digital SLR camera know what a circular polarizing filter is. They frequently employ them in landscape photography to decrease glare from the scene. As a result, for example the sky is darkened and the surface of water becomes more transparent. Fewer photographers, though understand that polarizing filters are useful with a much wider variety of subjects including closeup vegetation, portraits, plastic, wood and other non-metallic surfaces.
Glare is best eliminated when taking the shot. Software such as Photoshop simply just can’t do as good a job as a polarizing filter, and in some cases, such as the surface of water software simply cannot see through the glare to the objects below.
You may already use a polarizing filter to darken the sky in your landscape photos, and this post will demonstrate how that same characteristic can be used to enhance a wide variety of other subjects. I encourage you to experiment to find your own uses for this simple but powerful filter.
The Polarizing Filter
A circular polarizing filter blocks oblique, or off axis light preventing glare from entering the camera. As with your polarized sun glasses, this also enhances the color of the scene, sometimes to an amazing degree. A circular polarizing filter is adjusted by turning it until you obtain the desired effect. For the sky the filter will work best when shooting 90 degrees from the position of the sun, however the filter also works on cloudy days and with artificial light including light from a camera flash.
You can adjust the amount of oblique light that is blocked by rotating the filter though this will also change the effectiveness of its glare reducing property.
I use a Nikon CP-15 77 mm circular polarizing filter pictured below. I use adapter rings for my other lenses to step them up to 77 mm allowing me to use this same filter on all of them.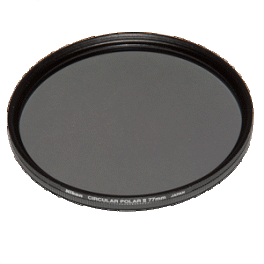
If you don’t own a polarizing filter but have polarized sunglasses, take them off and rotate them in front of one eye to see how the filter works.
Exposure Compensation
Polarizing filters prevent the light from glare from entering the camera, thus reducing the exposure. The amount of decrease can be from one to two stops. The camera will adjust the exposure to compensate for the reduced amount of light reaching the camera sensor, however you must make this adjustment yourself when shooting in Manual mode.
Image Comparisons
Here are some different subject comparisons to demonstrate the effect on different surfaces. In order to normalize the tonal range I set the white and black points equally for the images in each comparison .
In each comparison the image on the right was shot using the polarizing filter.
Click each image for a larger version.

Guitar Comparison
Note the darkening of the fret board and elimination of the glare on the surface of the guitar and the leather in the background. Also, the wood on the body has a richer tone in the image using the filter on the right. The scene is lit with diffuse sunlight coming through the windows to the right.

Piano Comparison
The difference here in the entire scene is dramatic. The diffuse light was entering from windows to the right of the image. Let me emphasize that this color and saturation effect is completely due to the use of the polarizing filter.

Oil Painting Comparison
This is a painting by the Russian artist Aleksandr Kargopoltsev in residence in La Conner, Washington. Here the difference is subtle but the colors are richer on the right and you will see reduced glare throughout the image, including the picture frame. I lit this from the right using an off camera strobe.
The painting is under copyright of Aleks Kargopoltsev.

Oil Painting Closeup Comparison
This is a closeup of the same painting. Here the difference is subtle but the colors are richer and you will see much less glare throughout the right hand image.

Oil Paintings Courtesy of Aleks Kargopoltsev, Russian Artist in Residence La Conner, Washington
My friend and a great artist.

Children’s Play Set Comparison
The deeper blue and lack of reflection is prominent in this children’s play set example. Note that there were water drops on the surface but the plastic itself is mainly causing the glare. The light was diffuse from a cloudy sky.

Closeup of Play Set Comparison
This closeup is of the children’s play set in the previous example.

Apple Comparison
There are two main differences in this apple comparison. The most obvious is that the glare on the left side of the apple has been eliminated. The second, though is that the reflection of the stray light that was illuminating the right side of the apple was also reduced, enhancing the left-right contrast of the subject. As with the other comparisons, I set the white and black points equally in each images to normalize the tonal range.

Mushroom Comparison
Here two changes resulted from using the filter on mushrooms which are normally thought of as having low glare surfaces. The glare cast from the diffuse window light to the left on all the mushrooms was greatly reduced and the colors of the mushrooms and the surface they rested on were enhanced.

Rose Comparison
This rose comparison shows the subtle difference using the polarizing filter on the droplet highlights, being reduced in the right-hand version. This is one case where the highlights may be useful to provide more definition in the image. The rose was lit with diffuse sunlight from the right.

Jasmine Comparison
The reduced glare and greater color saturation is easily seen in this comparison of Jasmine. The same effect is seen in landscapes and other shots with vegetation, even in the shade. The subject was lit with diffuse sunlight from the right.

Zebra Haworthia Comparison
Here is a Zebra Haworthia comparison. The subject was lit from diffuse sunlight from the right. The difference is subtle in this image, most noticeable at the left where the glare is removed from the image.

Thistle Comparison
This Thistle comparison is an excellent example of color enhancement under cloudy skies.

Soccer ball, Trees and Sky Comparison
And finally, though my team didn’t win the World Cup, here is an image dedicated to the game!
Tips and Techniques
Here are some tips and techniques I have found useful:
- For a quick way to see if a polarizing filter will improve the scene just hold it in front of the your eye or the lens and rotate it to see the effect.
- Rotating the filter increases or decreases its effect. Do so to obtain the desired effect.
- Decide if you want reflections before using the filter. You may see that a reflection in a window enhances to the composition or that you would rather have milky instead of clear water.
- When a blue sky is in the scene the filter will be most effective with the sun over your left or right shoulder, i.e. 90 degrees. But don’t let that deter you because the sky can be enhanced during post processing and you will still reduce glare from other components in the scene.
- Wide angle shots that include the sky may show some parts of the sky lighter than others due to the angle of the light hitting the filter. Either adjust this during post processing or keep the effect.
- Choose a high quality filter so that you do not compromise your images with lower quality glass and coatings.
- Use adapter rings for your different lenses instead of buying a polarizing filter for each lens size.
- Remove any UV or other ‘protective’ filter when using the polarizing filter to reduce internal reflections and flare. The only time I use a UV filter is when shooting near salt water spray and very close to small children as they have a habit of poking at the lens. Also, digital sensors are not sensitive to UV light and the UV filters only provide ‘light duty’ protection. But use what you are most comfortable with if it meets your needs.
- Use the polarizing filter for any subject that may have glare, even subtle glare. Take some test shots to determine its effectiveness.
Well, that’s all for this one. As always…
Happy shooting!
Michael
References
For a scientific treatment of Polarizing Filters in Photography read the Wikipedia posting at http://en.wikipedia.org/wiki/Polarizing_filters_(Photography)
Copyright Notice

Very interesting article, Michael! Good examples to motivate me to try some different subjects to photograph with my Polorizing Filter.
Thanks for your positive comment Vicki. I am glad you found the post useful! – Michael
thanks for the great article!
I’m currently completeley obsessed and in love with my polarizing filter after I had wanted one for a looong time, so I appreciate every tip I can find on how
on how to get the best out of it 🙂 sorry, hit the “post” button a little too early by accident
Hi Mona,
Glad you enjoyed the post and your filter. Sometimes its the simple things that matter the most and the polarizing filter certainly fits into this category.
Kind regards – Michael