
You likely are aware that there is limited depth of field in macro images. This is a wonderful benefit because it allows you to focus on one aspect of a subject while rendering the remainder as blurred supporting content. Sometimes, however you would like to capture the entire subject in detail. Here are two ways to achieve this.
Shooting closeups
The first is to take a relative close-up shot of the subject, for example a flower and crop the final image to look like it was shot at a 1:1 ratio. A 1:1 ratio is where the projected size of the subject on the camera sensor is the same size of the actual subject.
Shooting at greater distances from the subject works because depth of field increases with distance. The main drawback is that you will not necessarily capture a crisp image with the minute detail seen in actual macro images. Even if you shoot with a 24 or 36 mega-pixel camera, any camera shake will reduce sharpness and this will be accentuated at greater distances. Also, some kit lenses may not have the resolution needed to capture the same level of detail that a high mega-pixel sensor can record resulting in the appearance of detail until you zoom into the image and see the blur at 100%.
There is another benefit of cropping close-ups which is that you don’t necessarily need a macro lens to shoot this way. Of course, because distance increases depth of field this technique is not as useful when trying to obtain shallow depth of field for artistic effect.
Using a macro lens
My preferred technique is to use a true macro lens shot at the minimum focusing distance to achieve a 1:1 ratio. The close shooting distance allows me to capture a sharper image with greater detail. Then I use focus stacking software to render the final image.
Focus stacking
In focus stacking you create a composite of multiple images using the sharpest parts of each. The final image renders sharp detail from the closest to the farthest points in the subject. You will need to use a sturdy tripod and shoot separate images advancing the focus from the closest part of the subject to the most distant part by turning the focus ring or using a focus rail. The key is to advance the lens focus plane in small enough increments to capture a slight amount of overlapping detail with the previous shot. Think of this image capture technique like an MRI machine that captures separate thin slices of the patient and assembles them into a full image. I tend to shoot at smaller focus increments to ensure a greater amount of overlap and sharpness.
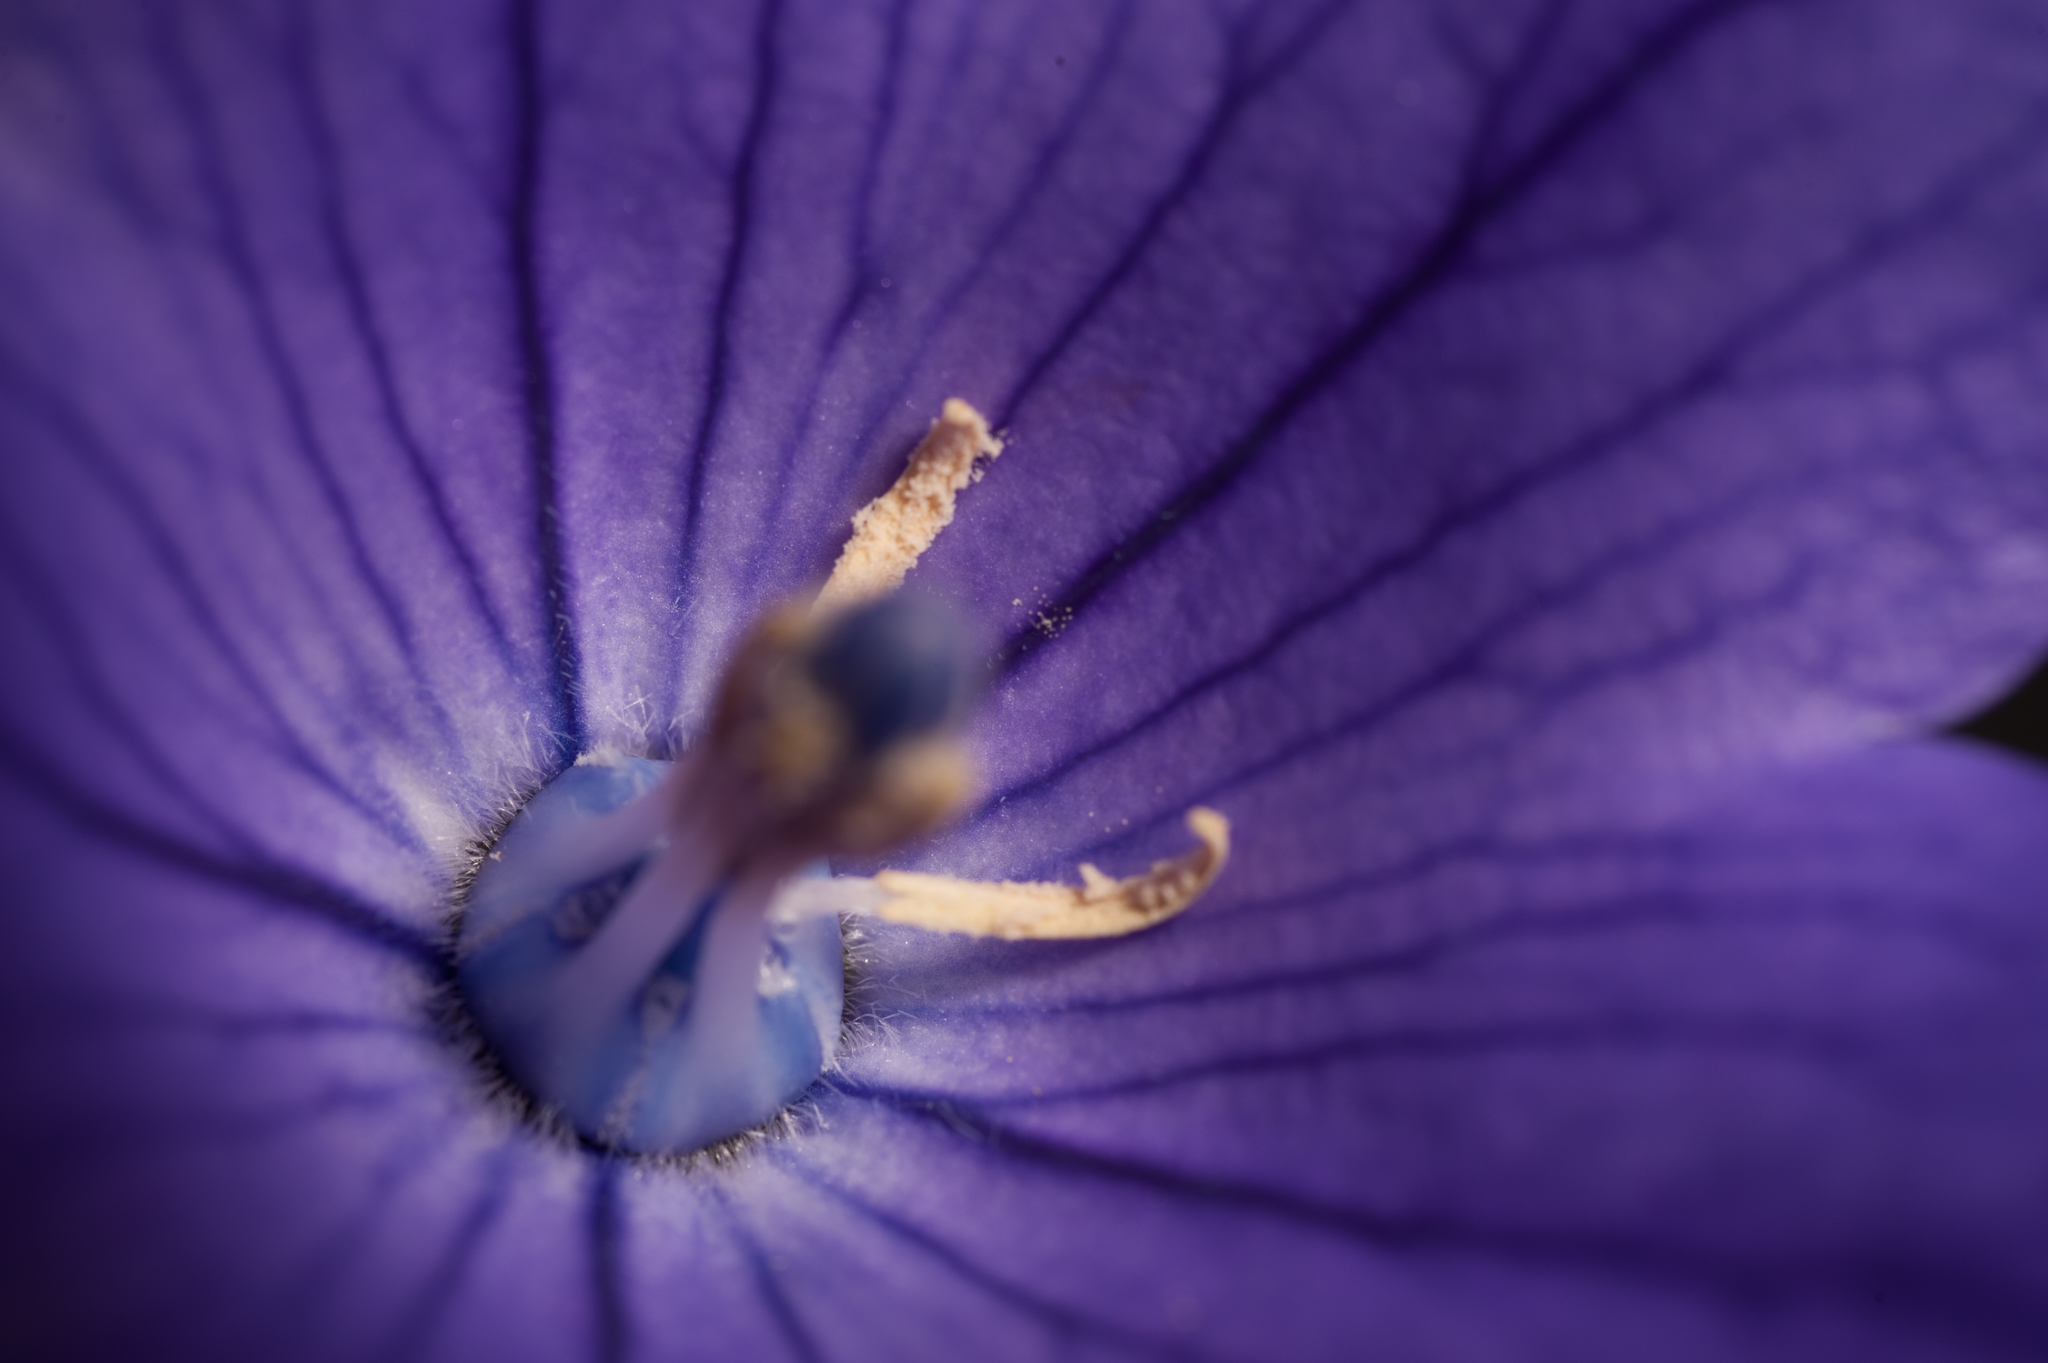
Here is a stacked macro image of a Balloon Flower, or Platycodon. I created it from 29 source images shot using a Nikkor 60mm macro lens mounted on a Nikon D700 full frame sensor and a tripod mounted focus rail. I advanced the rail about 1/2 mm for each shot. I reduced the image size for this blog but you can click on it and the other images in this post for larger versions.

To give you a better idea of the process I have included the 29 source images. I shot these at an f/16 lens aperture to achieve a relatively larger depth of field while avoiding diffraction from too small an aperture opening.
Detail
Remember I mentioned capturing detail using a macro lens? This next image is a crop from the stacked output showing an insect on the stamen. Keep in mind that the stamen itself is less than 2mm wide, so this insect is extremely tiny! These minute details add another dimension to shooting macro, making it even more interesting. Oh, the soft focus around the stamen is an artifact of the process but I will save a discussion of this for a future post.

Notice that I said this was ‘a’ bug, and not a herd of bugs. Because this insect was walking during the shoot it shows up multiple times in the stacked image! You can see this effect with any subject that contains a moving or changing parts such as an analog watch. Click on source images 1 through 5 and see if you can spot this insect. I could have eliminated this artifact using the focus stacking software or Photoshop and will discuss the procedures in a future post.
Here are the 29 source images advancing the focus from the tip of the stamen to its base.
Source image 1:

Source image 2:

Source image 3:

Source image 4:

Source image 5:

Source image 6:

Source image 7:

Source image 8:

Source image 9:

Source image 10:

Source image 11:

Source image 12:

Source image 13:

Source image 14:

Source image 15:

Source image 16:

Source image 17:

Source image 18:

Source image 19:

Source image 20:

Source image 21:

Source image 22:

Source image 23:

Source image 24:

Source image 25:

Source image 26:

Source image 27:

Source image 28:
Source image 29:

Focus Stacking Software
Adobe Photoshop provides the capability to stack images. This functionality doesn’t let you make adjustments to the focus stacking process, however. Instead I recommend using Helicon Focus from Helicon Software because it allows you to adjust the process to achieve the best results. It also lets you create a very cool 3D animated image that you can share. Visit http://www.heliconsoft.com/heliconsoft-products/helicon-focus/ for more information.
Conclusion
There you have it, the basics of focus stacking for macro photography. There is a bit more to be discussed such as lighting, camera settings, focusing rails and eliminating stacking artifacts but I will save these for future posts. Feel free to post questions or comments.
Before I forget, why not shop where I do. Click on the Adorama ad below to shop for photography gear at great prices and I will receive a small reward at no cost to you. Thanks!
Happy shooting,
Michael
